Inspiration
Mechanical Dragon
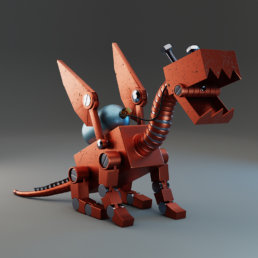
I recently stumble upon this amazing artwork of a mechanical dragon from artist Yigit Koroglu. Please check his Artstation profile, his work is absolutely fantastic. I fell in love with this piece and decided to give this cute little dragon a bit of Blender magic.
It will be a quite journey for me, since beside modelling, my plan is to create unique textures, to rig finished model, think about concept scene, camera and lights and finally do little animation to give it some life. I never done rigging. I never used Substance Painter and I am just a noob in blender and animation…
But every step we make in the right direction will eventually lead as to the destination 🙂
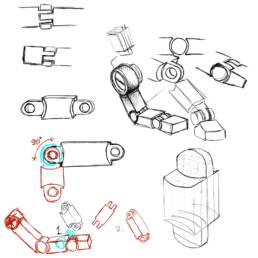
Step 1. Sketches and analysis
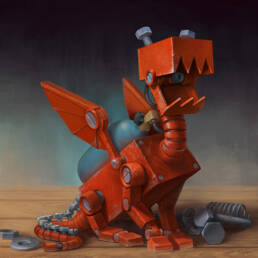
This is original work by Yigit. Original artwork here.
Based on original artwork I wanted to make some planning how I will model in Blender. Joints in the image are not based on real mechanical joints, so I made little adjustments to them. I had to think about range of movement for each joint and to leave enough space between elements for that. My final choice of “bones” and joints between them is in the sketch right corner. This approach will allow me to model just one part and rotate it as I find it fit.
Since I never rigged before, maybe I will need to adjust some parts more. But for now, I was ready to move on to modeling.
Step 2. Modeling

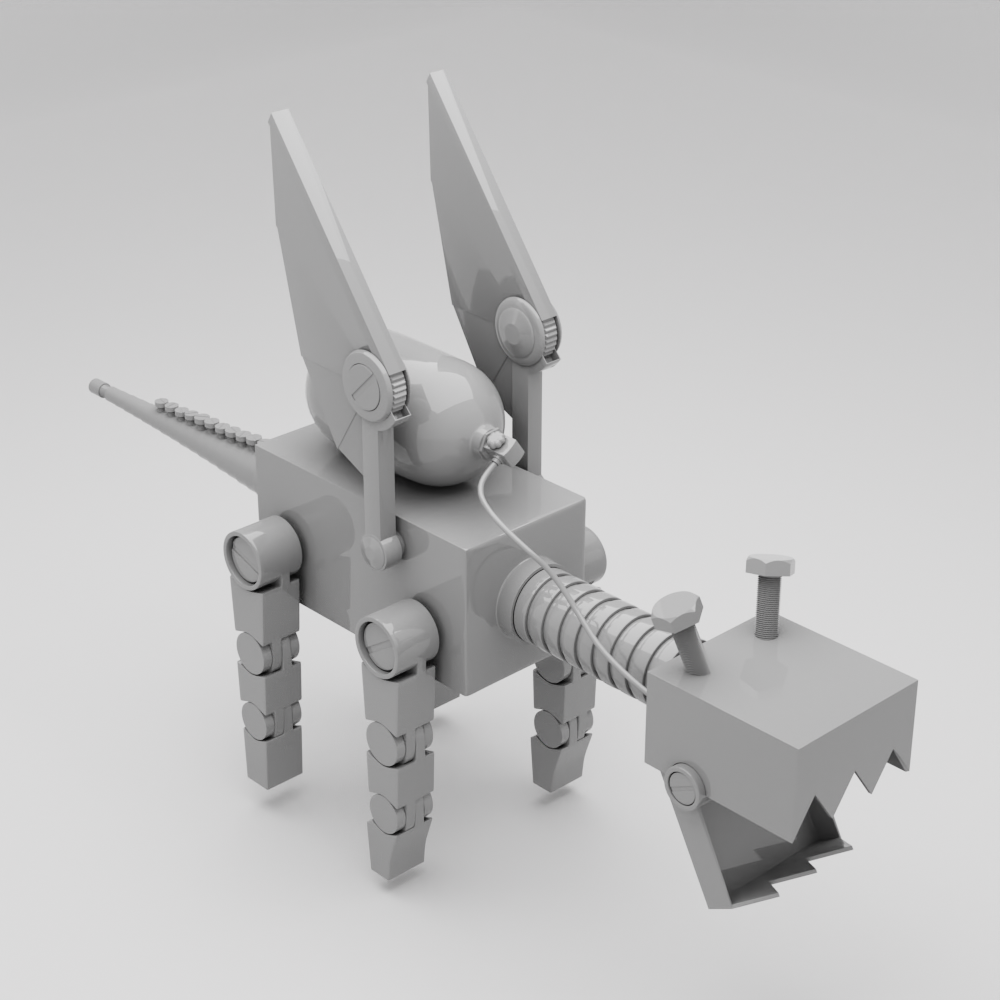
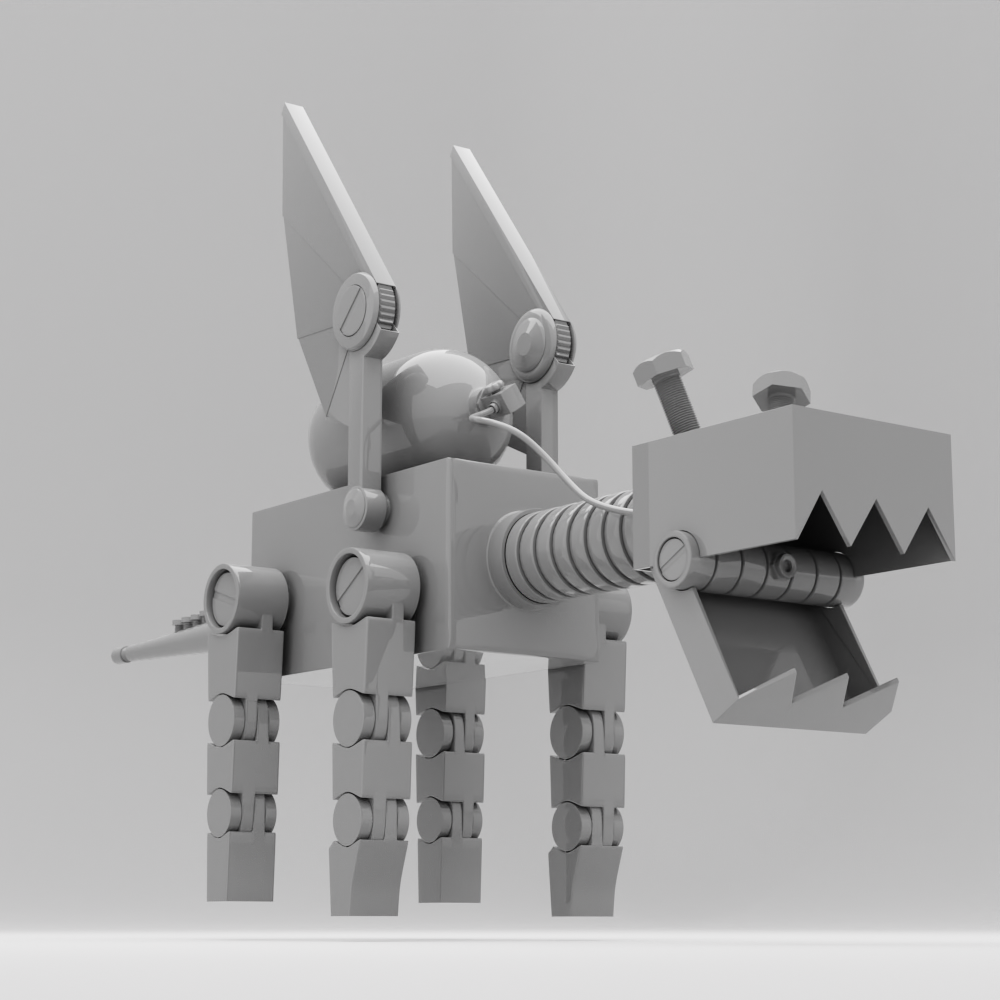
Modeling body, head, front and back legs was not that complicated. I figured that since legs are made from several parts organised in collections I have no idea how can I apply mirror modifier to whole collection. Since I did not find a way to do it, I simply join all parts and then applied modifier on it.
Neck and tail are made of separate rings. Is there a way to select that every array iteration be little less in size as previous? That would have been very useful for tail. Since I do not know answer to that, I made them manually.
I see always model before rigging in this “arms spread” pose, so I made my model in similar pose. I hope that will help me little later 🙂
Step 3. Textures

I manually posed model as in the original art. Setup camera angle and added some area lights so that I can check on metal reflections.
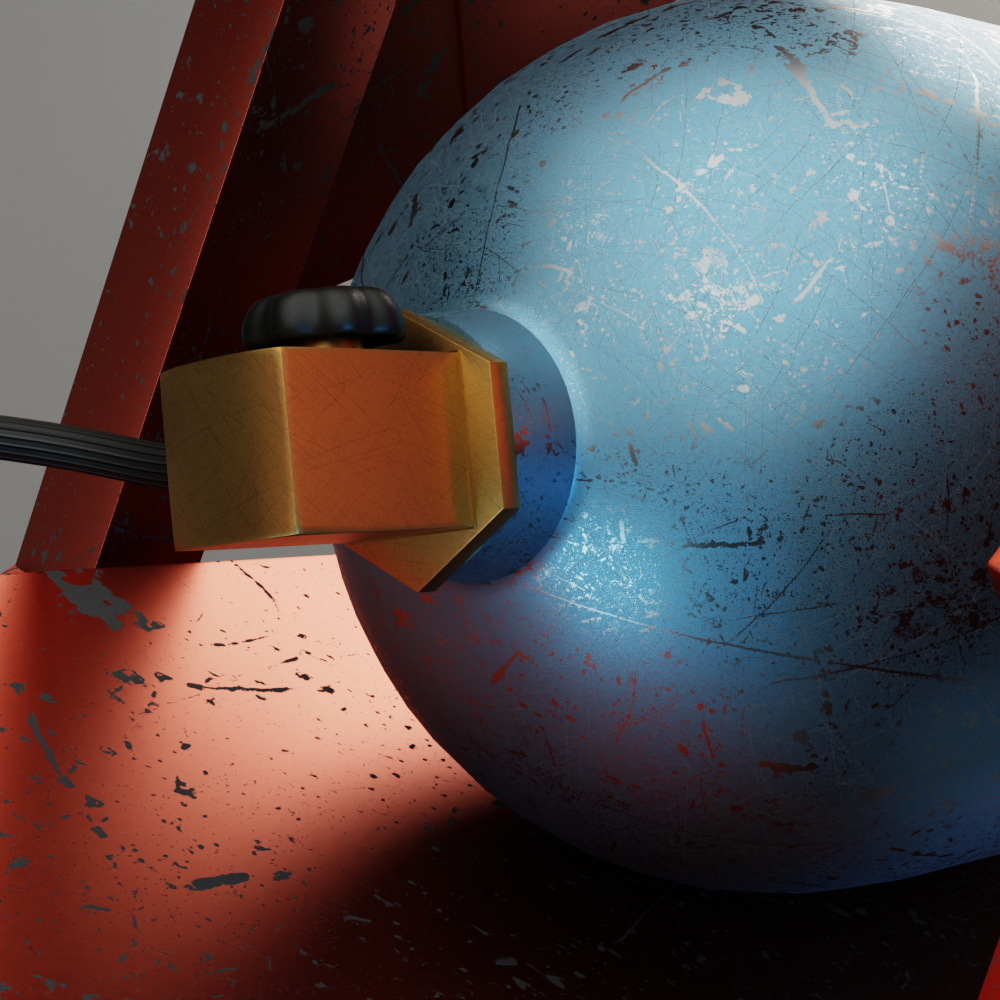
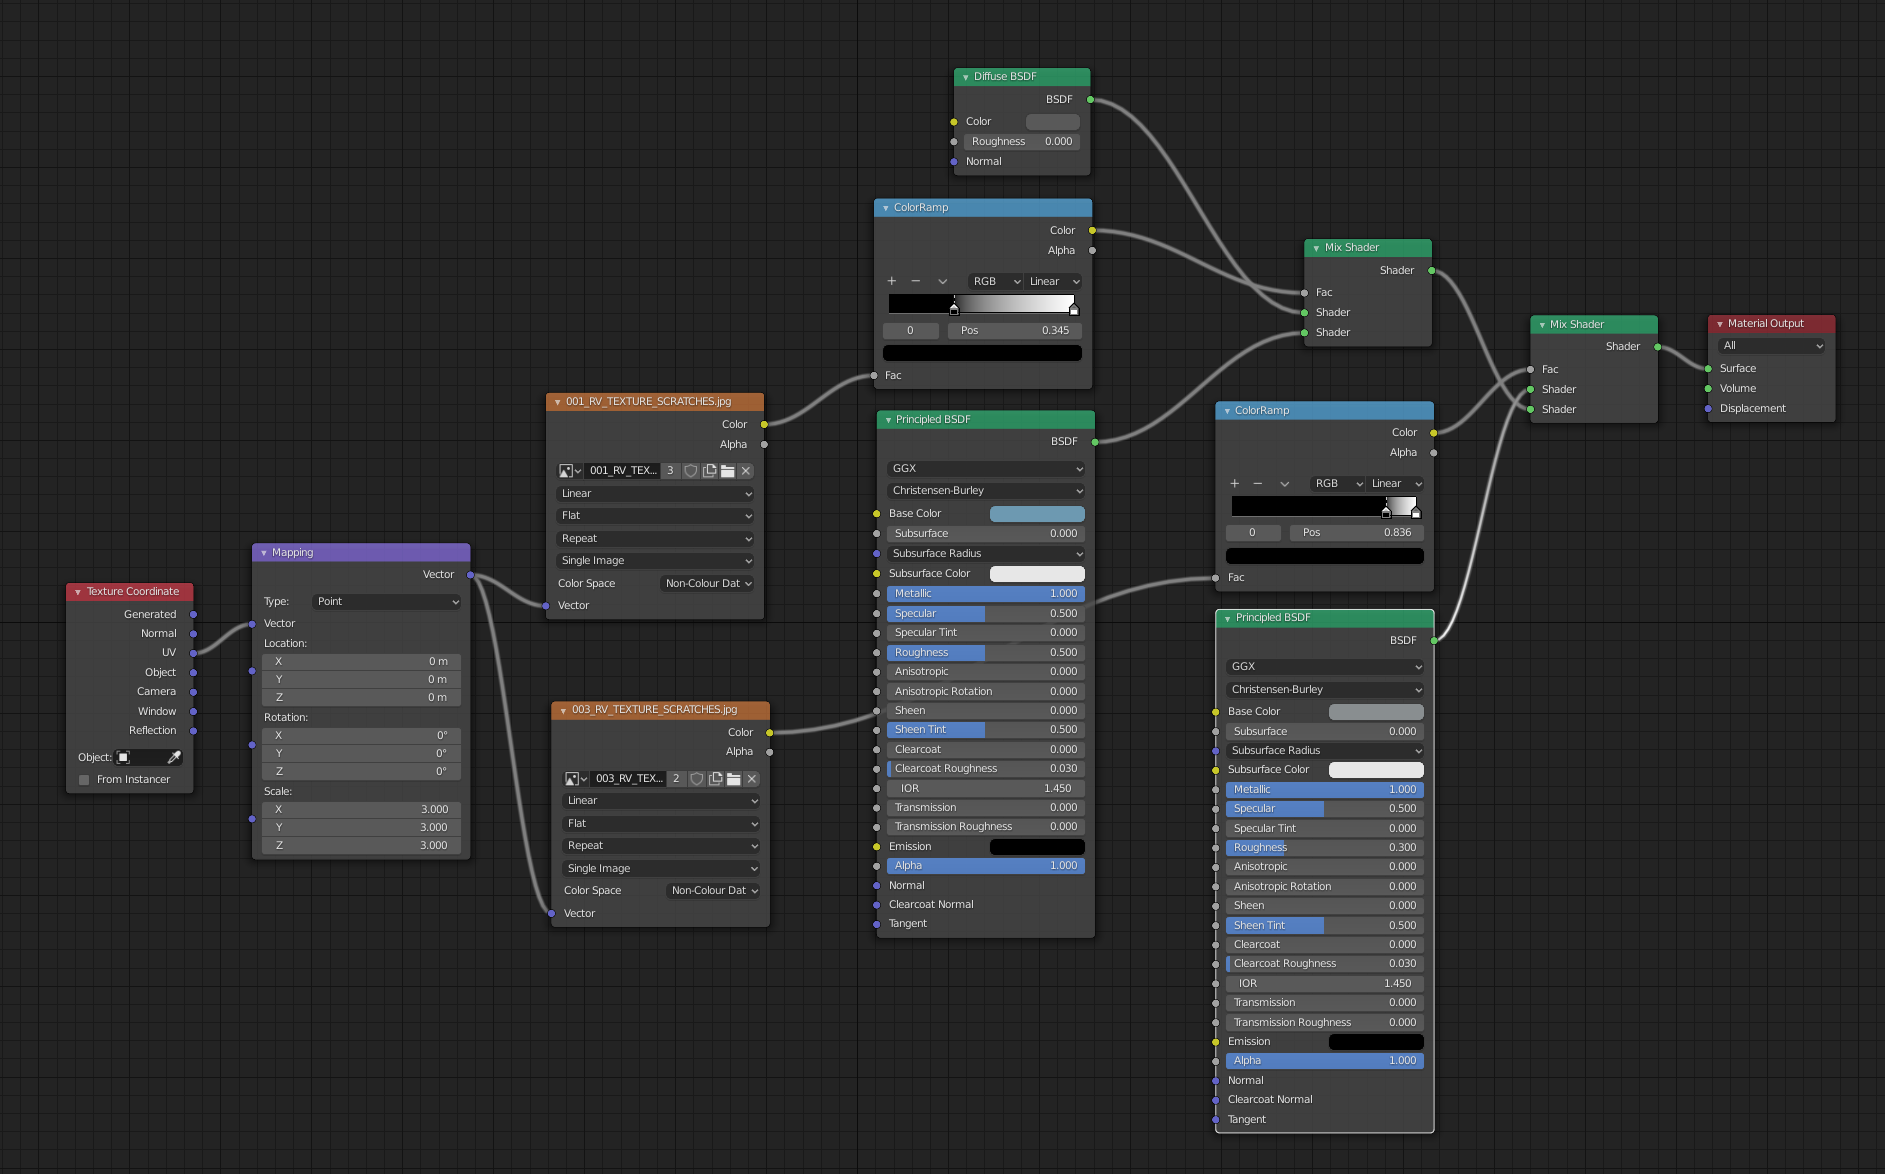
I created 4 basic metal textures. Red, grey, yellow and light blue and applied them to corresponding model parts. I never used Substance Painter so I made simple shaders by mixing basic metal textures with some image textures of scratches.
So far so good 🙂